

I had an old UPS lying around and decided to put it to use to protect my TrueNAS server.
To ensure the server could detect a power outage and shut down gracefully, I needed a way to monitor the UPS. The most common solution is to use NUT (Network UPS Tools). NUT lets you broadcast UPS information to other NUT clients. This server functionality allows other systems to access your UPS information and react accordingly.
I set up UPS monitoring on my Proxmox host, which runs a Debian-based OS. In the future, I plan to move the NUT service to a Raspberry Pi, which can run for many hours on UPS power and later wake up the Proxmox server.
For now, my main goal was to verify that I could get data from the UPS.
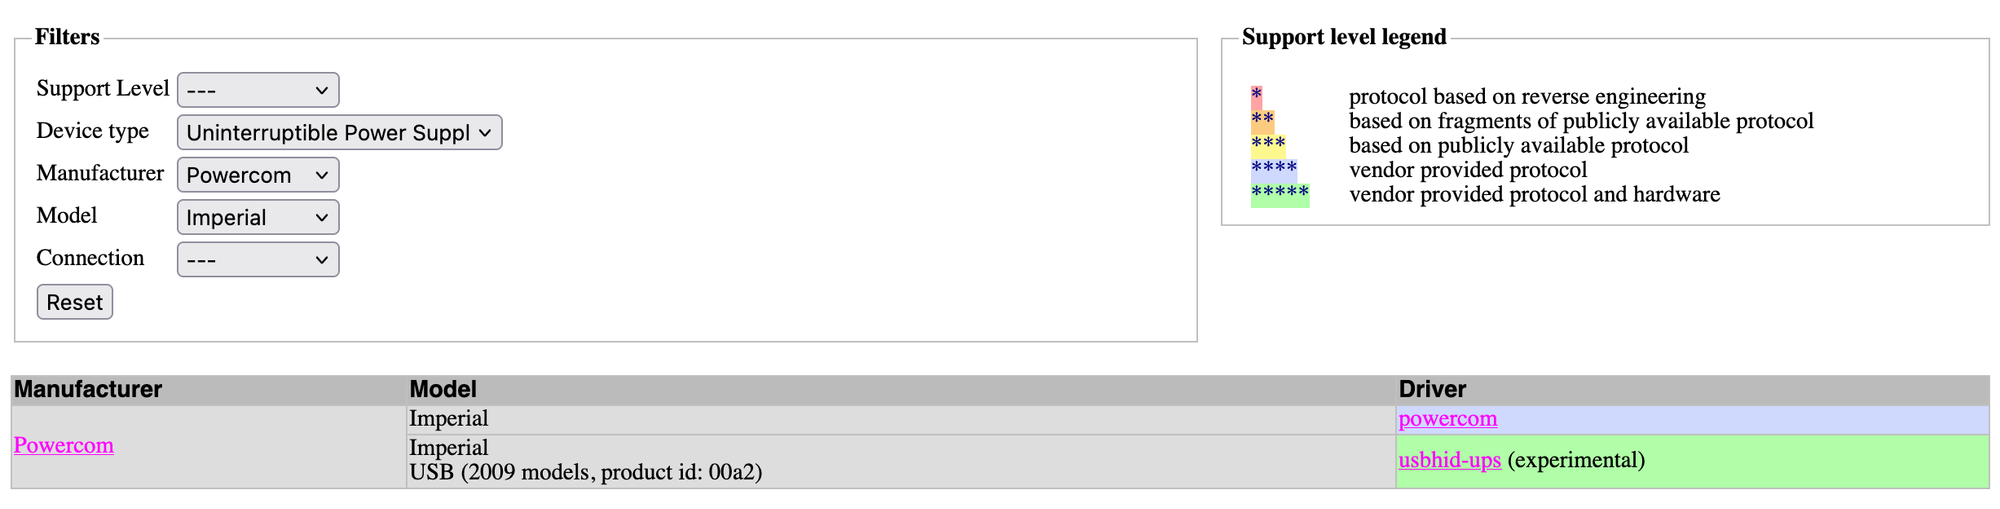
My UPS is the Imperial IMD-525AP, a quite old model. Mine is likely from before 2009, as the usbhid-ups driver didn't recognize it.
Installing NUT https://networkupstools.org/
sudo apt update
sudo apt install nut
Getting your UPS Vendor and Product ID
Connect UPS to a computer with provided USB cable and then use this command:
lsusbYou'll see output similar to this:
Bus 002 Device 002: ID 174c:3074 ASMedia Technology Inc. ASM1074 SuperSpeed hub
Bus 002 Device 001: ID 1d6b:0003 Linux Foundation 3.0 root hub
Bus 001 Device 004: ID 0d9f:0002 Powercom Co., Ltd Black Knight PRO / WOW Uninterruptible Power Supply (Cypress HID->COM RS232)
Bus 001 Device 002: ID 174c:2074 ASMedia Technology Inc. ASM1074 High-Speed hub
Bus 001 Device 003: ID 26ce:01a2 ASRock LED Controller
Bus 001 Device 001: ID 1d6b:0002 Linux Foundation 2.0 root hub
You're interested in the part after ID — that's the Vendor ID and Product ID, separated by a colon (:).
In my case:
- Vendor ID:
0d9f - Product ID:
0002
Configuring NUT
Edit the UPS configuration file:
sudo nano /etc/nut/ups.confInitially, I tried the usbhid-ups driver, but it didn’t work despite many efforts. Eventually, I discovered that my UPS was too old and switched to the powercom driver.
# add this to the end of the /etc/nut/ups.conf
[ups]  # this is the name of your ups (you could have many of them)
driver = powercom  # which driver to use
# arguments for driver is here - https://networkupstools.org/docs/man/powercom.html
type = IMP # extra argument
port = /dev/ttyUSB0
nobt = true  # If this flag is present, the battery check on startup is skipped
user = root
To determine your usb port you can use - https://unix.stackexchange.com/questions/144029/command-to-determine-ports-of-a-device-like-dev-ttyusb0
Why user = root ?? Because that /dev/ttyUSB0 has owner root and group dialout
But by default NUT user is from nut group. I found this advice:
cp /lib/udev/rules.d/62-nut-usbups.rules  /etc/udev/rules.d/
sudo nano /etc/udev/rules.d/62-nut-usbups.rules
# search for PowerCom section and add this
ATTR{idVendor}=="0d9f", ATTR{idProduct}=="0002", MODE="664", GROUP="nut"
# reconnect UPS's usb cable
But it didn't work. So I just add user parameter to the driver settings so NUT could access this usb port.
To test the connection:
sudo /lib/nut/powercom -a ups -u root -DDDD# In case of stuck processes:
sudo killall powercom
Enabling NUT to be accessible via network
sudo nano /etc/nut/upsd.confAdd this line at the end - it will expose NUT on all network interfaces
# add this line to the bottom
LISTEN 0.0.0.0 3493
Setting up a NUT User
sudo nano /etc/nut/upsd.usersNext lines define a user called upsmon, with a password that you define (psswd for this example).
I also define this user as a primary node as the UPS is connected to the local computer itself. If you are connecting to a remote NUT server then this would be a secondary node.
[upsmon]  # name of user
password = psswd  # your password
upsmon primary
actions = SET  # Let the user do certain things with upsd.
instcmds = ALL  # Let the user initiate specific instant commands (like disable beeper, etc...)
Configuring the NUT UPS Monitor
sudo nano /etc/nut/upsmon.confYou need to write in format
MONITOR <UPSNAME>@localhost 1 <USERNAME> <PASSWORD> primaryPrimary basically just tells Nut that this UPS is connected directly to our
So in my case I wrote
MONITOR ups@localhost 1 upsmon psswd primaryConfiguring NUT as a net server
sudo nano /etc/nut/nut.conf
# Search for a line - MODE=none
# Change it to:
MODE=netserver
Enabling and starting nut services
# for the first time
sudo systemctl enable nut-server
sudo systemctl enable nut-monitor
#
sudo systemctl restart nut-server
sudo systemctl restart nut-monitor

# check the status and errors
sudo systemctl status nut-server
sudo systemctl status nut-monitor
If everything is ok you can check usp with command
upsc <UPSNAME>

$ upsc ups
Init SSL without certificate database
battery.charge: 100.0
device.mfr: PowerCom
device.model: IMP-525AP
device.serial: Unknown
device.type: ups
driver.name: powercom
driver.parameter.nobt: true
driver.parameter.pollinterval: 2
driver.parameter.port: /dev/ttyUSB0
driver.parameter.synchronous: auto
driver.parameter.type: IMP
driver.version: 2.8.0
driver.version.internal: 0.19
input.frequency: 50.00
input.voltage: 224.0
input.voltage.nominal: 220
output.frequency: 50.00
output.voltage: 224.0
ups.load: 9.0
ups.mfr: PowerCom
ups.model: IMP-525AP
ups.model.type: IMP
ups.serial: Unknown
ups.status: OL
ups.status: OL means ONLINE - the UPS is running on wall power.
Configuring TrueNAS
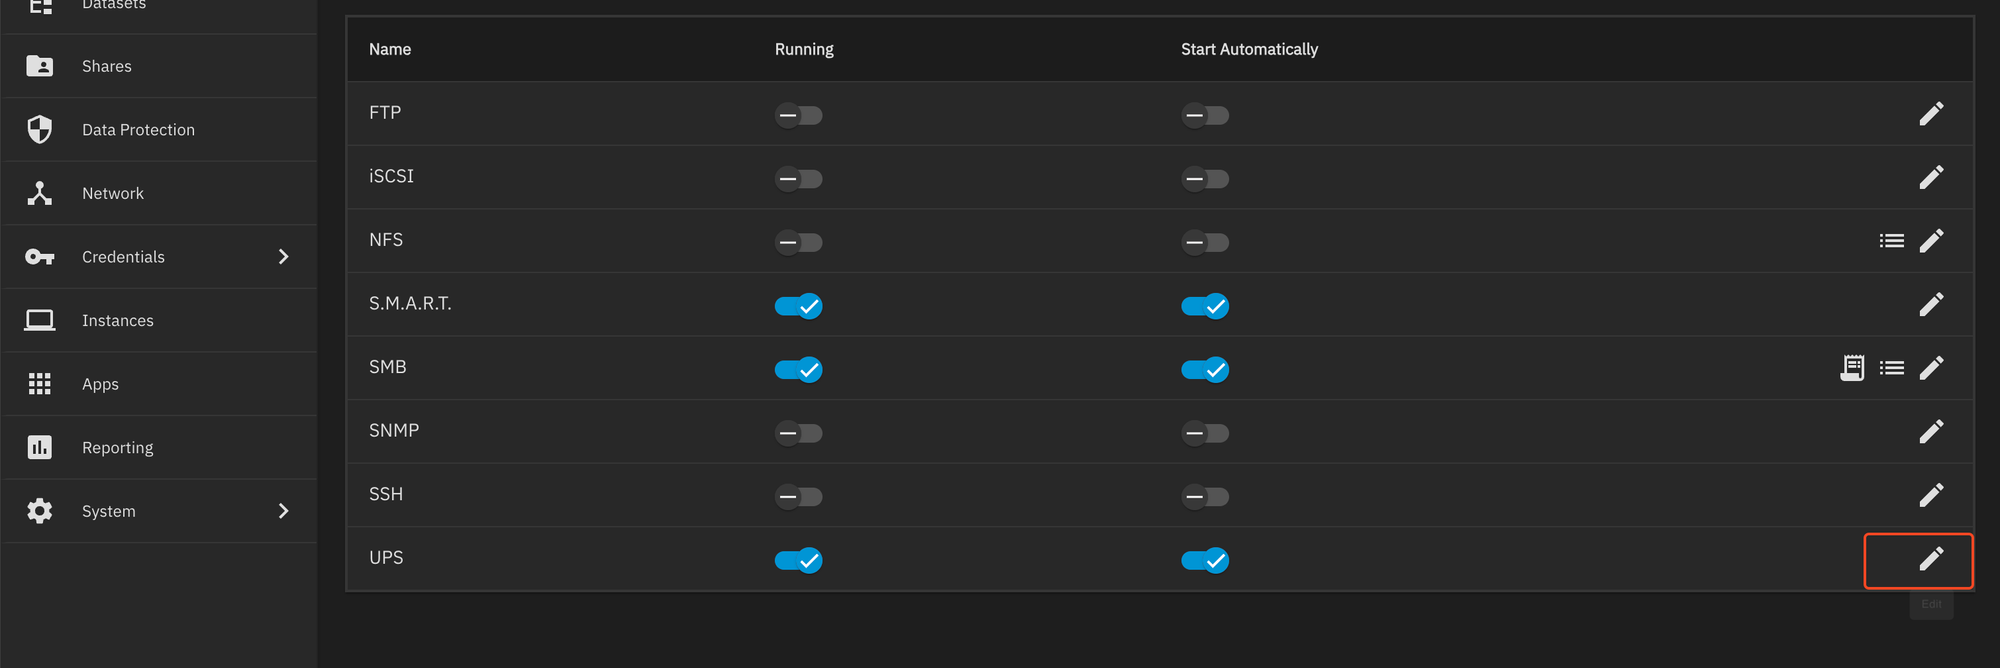
Go to `System->Services->UPS. Enable it and enable starting automatically.

Save settings, then go to Settings->Shell
To check that your TrueNas could connect to UPS, type command
upsc <ups_name>@<nut_server_host>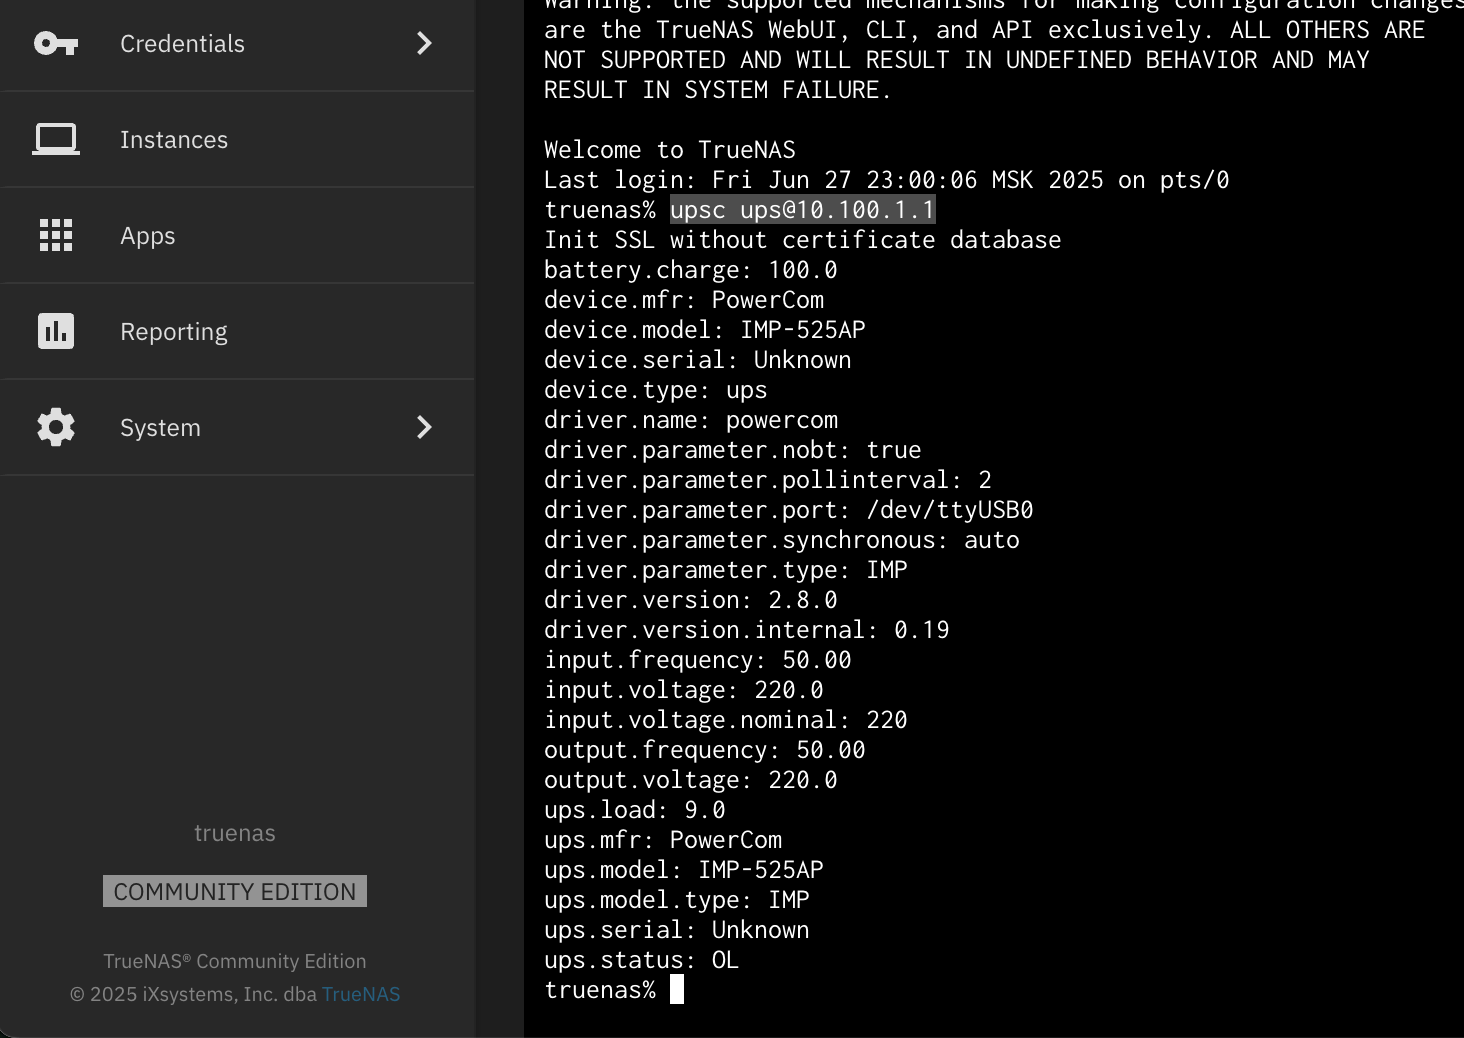
Yes!